Introduction
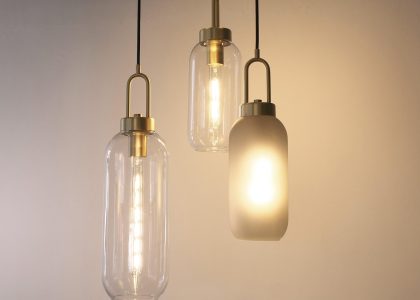
A swag light fixture is a decorative lighting piece that can add personality and style to any room. Its elegance and simplicity make it a popular choice among homeowners who want to enhance their home decor. However, swag light fixtures can be quite expensive to purchase, and many people can’t afford the luxury of this unique piece of decor. But worry not! In this article, we will guide you through seven simple steps to create your own swag light fixture that is cost-effective, unique, and stunning.
Step 1: Gather Your Materials
Before you embark on creating your swag light fixture, you need to gather all the necessary materials. This includes:
- Ceiling hooks
- Drill
- Swag kit (which includes a chain, a plug, and a switch)
- Pendant light kit (which includes a socket, a bulb, and a shade)
- Light bulb
- Measuring tape
- Fishing line
- Scissors
- Optional: spray paint, stencils, and markers for decoration
Step 2: Choose Your Location
The next step is to select the location where you would like to hang your swag light fixture. Measure the distance from the ceiling to the desired location using a measuring tape. The distance will determine how long your chain needs to be. Decide the ideal location taking into account the amount of light you need, the available power supply, and the decor of the room.
Step 3: Install Your Ceiling Hooks
Determine the exact spot where you want to hang your swag light fixture and drill a hole into the ceiling. Insert the ceiling hook into the hole by twisting it in a clockwise direction firmly. Make sure that the hook is installed straight and secure. Repeat this step for the next hook.
Step 4: Assemble Your Swag Kit
Once you have your ceiling hooks in place, assemble your swag kit. Thread the chain through the hook and adjust the length to make it even. Next, attach the plug to the end of the chain, ensuring that the switch is located at a convenient distance for turning the light on and off. Remember to use a grounded plug to avoid electrical hazards.
Step 5: Set Up Your Pendant Light Kit
Now, you can assemble your pendant light kit. Attach the pendant light holder to the chain using the threaded loop. Depending on the kit you selected, you may need to attach a shade to the light holder or use the bulb directly. Ensure the bulb is the right wattage for your fixture and that the shade is secure.
Step 6: Hang the Pendant Light
Attach the pendant light to the ceiling hook through the hook loop, ensuring that the pendant light hangs straight. Test your connections and tighten any loose components. Finally, tuck the electrical cord neatly along the chain, so it’s not visible.
Step 7: Decorate Your Swag Light Fixture
Your swag light fixture is now set up and ready to shine, but it can reflect your personality and style further by decorating it. You can use stencils and markers to add intricate designs or spray paint to color your fixture. Let your imagination run wild, and make your swag light fixture truly unique!


