
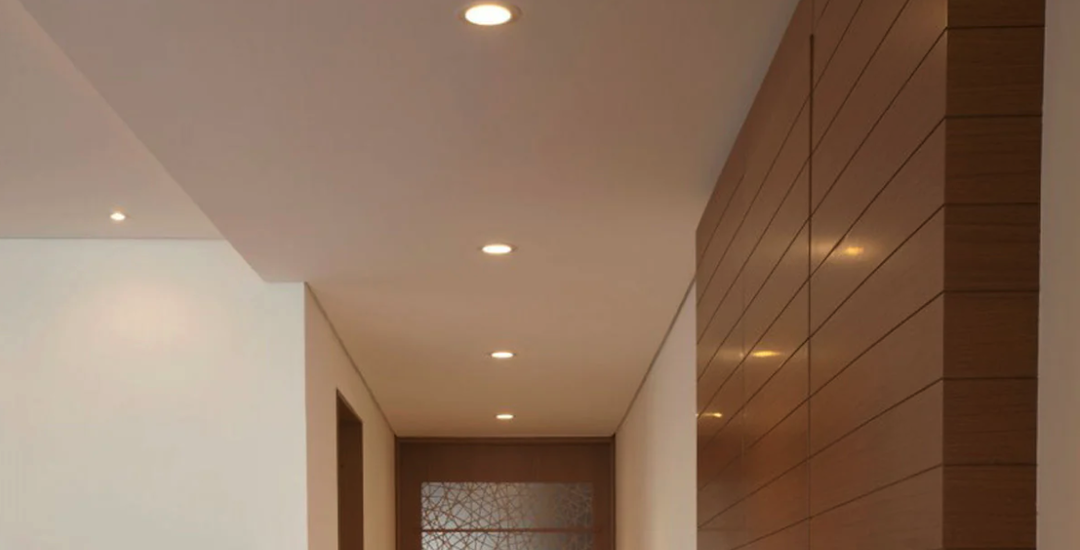
Adjustable angle downlights are a fantastic, practical choice for accentuating a wall because they offer precise control over light direction, allowing you to highlight features, textures, or artwork exactly as you intend. They’re much more versatile than fixed downlights, which often cast a general wash of light, or track lights, which can sometimes dominate a ceiling visually. With adjustables, you get focused drama without unnecessary clutter.
When it comes to making a specific wall pop, a regular fixed downlight often falls short. It’s like trying to paint a detailed picture with a broad brush – you just can’t get the precision you need. Adjustable downlights Ezerliving are different; they’re designed for exactly this kind of task.
Precision beam control
The biggest advantage here is the ability to direct the light exactly where you want it. Imagine you have a beautiful piece of art or a unique textured wall covering. A fixed downlight might illuminate the top part of the wall, but an adjustable one lets you tilt and swivel the beam to catch the highlights and shadows that make that feature special. You’re not just throwing light at a wall; you’re sculpting it.
Highlighting specific features
Whether it’s a built-in bookshelf filled with curated items, a stone fireplace, or a gallery wall, adjustable downlights allow you to individually illuminate each element. This creates depth and interest that a flat wash of light simply can’t achieve. Think of it like a spotlight on a stage – it draws the eye to the key performers.
Creating theatrical effects
Lighting isn’t just about brightness; it’s about mood and drama. By angling the light, you can play with shadows and create a really dynamic atmosphere. A sharply angled beam can create dramatic shadows that emphasize texture, while a softer angle can gently wash a surface. This control lets you completely change the feel of a room with the flick of a switch.
Different Types of Adjustable Downlights
The world of adjustable downlights isn’t a one-size-fits-all situation. There are a few main types, and understanding their differences will help you choose the right fit for your project.
Gimbal Downlights
Gimbal downlights are probably the most common type you’ll encounter. They feature a light source mounted within a pivoting ring, allowing you to tilt the light in a specific direction.
Internal Gimbal (Eyeball)
These often have the light source recessed slightly, with the entire inner ‘eyeball’ rotating and tilting. They offer a clean look as the adjustable mechanism is largely hidden, giving a more integrated appearance into the ceiling. They’re great for general accenting where you need a good range of motion.
External Gimbal
With external gimbal lights, the adjustable part of the fixture might be slightly more visible, sometimes protruding a little from the ceiling. While this might be a aesthetic consideration for some, they often provide a wider range of motion, making them great for really precise angling, especially if you need to hit something quite far off-center.
Pinhole Downlights with Adjustable Optics
These are a more subtle option. Pinhole downlights have a very small aperture, making them barely noticeable in the ceiling when off. The magic happens within, where the light source can be angled even though the exterior remains fixed.
Deeply Recessed Optics
The light source is set back significantly within the fixture, which helps to reduce glare. This design, combined with adjustability, means you can direct light precisely onto your accent wall without the viewer seeing the light source itself, creating a very clean, discreet effect. It’s like magic – light appears on the wall, but you don’t see where it’s coming from.
Adjustable Beam Angle Lenses
Some advanced pinhole downlights allow you to not only adjust the direction but also the spread of the light beam. This means you can choose a tight spot to highlight a small object or a wider flood to wash a larger section of the wall, all from the same fixture. This level of flexibility is incredibly powerful for fine-tuning your accent lighting.
Scoop/Wash Downlights
While not always “adjustable angle” in the traditional sense of tilting a bulb, these fixtures are designed specifically to wash a wall. They often have a built-in reflector that directs the light at an angle, making them similar in function to an adjustable light aimed at a wall.
Asymmetrical Light Distribution
The key feature of scoop/wash lights is their asymmetrical light distribution. Instead of a circular beam directly downwards, they project an oval or fan-shaped beam outwards towards a wall. This is particularly useful for creating a smooth, even wash of light across an entire accent wall without hot spots or dark patches. They’re a good ‘set-it-and-forget-it’ option for wall washing.
Planning Your Accent Wall Lighting
Effective accent lighting isn’t just about picking a fixture; it’s about thoughtful planning. A little upfront consideration can make a huge difference in the final look and feel of your space.
Determine the focal point
Before you even think about buying a light, figure out what you want to highlight. Is it a painting, a textured wallpaper, a built-in shelf, or even just a specific corner? Knowing your focal point allows you to then work backwards in terms of light placement and angle.
Artwork or gallery wall
For art, consider the size and style. A single piece might benefit from one or two focused beams, while a gallery wall could use several strategically placed lights to highlight individual pieces or create an overall glow. Think about the frame and canvas texture – lighting can bring these details to life.
Architectural features
Stone cladding, brickwork, or paneling all have inherent textures. Angled light can dramatically enhance these textures, creating dynamic shadows that add depth and character to the wall. It’s about more than just illuminating; it’s about revealing.
Built-in shelving or niches
If you have shelves or recesses you want to draw attention to, adjustable downlights can be installed above them to illuminate the contents. This is particularly effective for displaying collectibles, books, or decorative objects, making them stand out against the wall.
Select the right beam angle
This is crucial. The beam angle dictates how wide or narrow the light spread will be. It’s not just about the fixture, but the bulb you use within it (if it has replaceable bulbs).
Narrow beam (10-30 degrees)
Ideal for highlighting small objects, specific pieces of art, or creating dramatic spot effects. A narrow beam will create a strong, focused circle of light, often with harsher edges. This provides high contrast.
Medium beam (30-60 degrees)
A versatile choice for general accenting of features like architectural details or a medium-sized painting. This offers a good balance between focus and spread, producing a softer spot than a narrow beam.
Wide beam (60+ degrees)
Suitable for washing larger wall sections or illuminating broader architectural elements. While ‘washing’ is often done with dedicated wall wash fixtures, an adjustable downlight with a wide beam can achieve a similar effect for smaller areas.
Consider mounting height and distance
The placement of your downlights relative to the wall and the object being lit will dramatically affect the outcome.
Ceiling height impact
Higher ceilings give you more flexibility in terms of where you can place the light, but also mean the light source is further away, so you might need more powerful bulbs or narrower beams to achieve the desired effect. Lower ceilings require more precise placement to avoid glare and ensure a pleasing angle.
Distance from wall
Generally, the further the downlight is from the wall, the wider the wash of light will be, but also potentially less intense. Closer placement will create more focused, sometimes more dramatic, effects. For a general wash, you might want to place them 12-18 inches from the wall. For spotlighting, closer might be better.
Angle of incidence
This is all about how the light hits the wall. An acute angle (light hitting the wall almost parallel to it, from a fixture close to the wall) will emphasize texture and create long shadows. A more obtuse angle (light hitting the wall more head-on, from a fixture further away) will provide a more even wash and less dramatic textural emphasis. It’s about experimenting to get the look you want.
Integrating Adjustable Downlights into Your Design
It’s not just about functionality; it’s about how these lights fit into the overall aesthetic of your room. Good lighting design feels intentional and cohesive.
Recessed vs. Surface Mount
The choice between these two often comes down to your ceiling type and aesthetic preference.
Seamless recessed look
For a clean, minimalist aesthetic, recessed adjustable downlights are the way to go. They are installed flush with the ceiling, making them virtually disappear when not in use. This keeps the focus on the light effect, not the fixture itself. If you have the ceiling depth, this is usually the preferred option.
Surface mount for exposed ceilings or flexibility
If you have an exposed concrete ceiling, or if you prefer a more industrial or contemporary look, surface-mounted adjustable downlights can be a great option. They are visible on the ceiling but can add to the room’s character. They might also offer easier installation if cutting into the ceiling isn’t feasible.
Dimming capabilities
This is a non-negotiable feature for accent lighting. Being able to adjust the intensity of the light is critical for setting the right mood and highlighting features subtly or dramatically.
Creating different moods
A fully dimmed light might provide a soft, ambient glow to a textured wall for a cozy evening, while a brighter setting can highlight a piece of art clearly during the day or for entertaining. Dimming allows for incredible versatility.
Enhancing depth and drama
By dimming the light, you can play with the contrast between illuminated areas and shadows, enhancing the perception of depth and adding a dramatic flair to your accent wall.
Color temperature (CCT) considerations
The color of the light itself plays a massive role in how your accent wall will appear. This is measured in Kelvin (K).
Warm white (2700K-3000K)
This creates a cozy, inviting atmosphere. It’s excellent for highlighting natural materials like wood or stone, and can make warmer-toned artworks pop. It evokes a sense of comfort and relaxation.
Neutral white (3500K-4000K)
A good general-purpose light that provides clear illumination without being too cold or too warm. It’s a good choice for accenting, especially if you want true color representation of an artwork or if your room has a more contemporary, less overtly warm palette.
Cool white (4500K-5000K+)
This is a crisp, bright light that makes colors appear sharper. While less common for residential accent walls due to its cooler feel, it can be appropriate in very modern, minimalist spaces or to emphasize cool-toned artworks or materials like chrome or glass.
High Color Rendering Index (CRI)
CRI measures how accurately a light source renders colors compared to natural daylight. For accenting artwork or textured walls, a high CRI is essential.
Accurate color representation
A high CRI (90+) ensures that the colors of your artwork, wallpaper, or natural materials are displayed faithfully. You don’t want your beautiful blue painting to look dull and greenish under poor lighting.
Bringing textures to life
Good color rendering also impacts how textures are perceived. A high CRI light will reveal the true depth and nuances of a textured wall, preventing it from looking flat or washed out.
Installation Tips and Best Practices
Even if you’re hiring a professional, knowing some installation basics can help you communicate your vision and ensure a successful outcome.
Pre-installation planning
Measure twice, cut once – this adage is particularly true for lighting.
Marking precise locations
Use a laser level or painter’s tape to mark the exact spots on the ceiling where you want the lights to go. Then, use string or rulers to visualize the beam spread on the wall below to fine-tune placement. It’s often helpful to do this in the evening with a flashlight to simulate the effect.
Wiring considerations
Think about how the lights will be powered. Do you have existing wiring, or will new runs be needed? How will they be switched? Will they be on their own dedicated circuit for full control? These are questions your electrician will need answers to.
Positioning for desired effects
The angle and distance are your key tools here.
Wall grazing for texture
To dramatically emphasize texture, position the downlights relatively close to the wall (e.g., 6-12 inches) and angle them sharply downwards. This creates pronounced shadows that highlight every bump and groove. This is called ‘wall grazing’.
Wall washing for even illumination
For a smooth, even wash of light across a larger section of the wall, place the downlights further from the wall (e.g., 18-36 inches, depending on ceiling height and beam angle) and angle them more gently. The goal here is to minimize harsh shadows and hot spots.
Spotlighting specific objects
For a single piece of art, aim the light so that the center of the beam hits the center of the artwork. Use a narrow to medium beam angle for focus. For multiple objects, each might need its own dedicated spot.
Avoiding common pitfalls
A few simple mistakes can ruin an otherwise good lighting plan.
Glare and eye comfort
One of the biggest issues with downlighting is glare. Ensure the light source itself isn’t directly visible from common viewing angles. Deeply recessed fixtures or those with anti-glare baffles are excellent for this. You want to see the effect of the light, not the light source.
Uneven illumination and hot spots
This can happen if lights are spaced incorrectly, or if beam angles are too narrow for the intended wash. Test your layout before final installation if possible. Use wider beams or overlap beams slightly to achieve a smoother spread.
Inadequate brightness
Sometimes, people choose fixtures or bulbs that just aren’t bright enough for the task. Consider the lumen output needed, especially for high ceilings or large accent walls. Dimming capabilities will allow you to reduce brightness, but you can’t add lumens that aren’t there.
By thoughtfully applying adjustable angle downlights, you can transform a plain wall into a captivating focal point, adding depth, character, and artistic flair to any room. It’s truly a powerful tool in interior design.